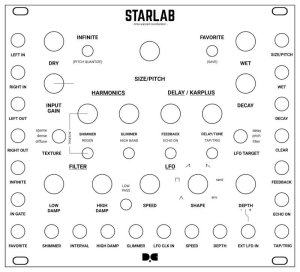
Dusty Clouds STARLAB Alternative panel Matte Black / Gold
Panel Only, Module not included...
This is an alternative black & gold panel for the Strymon StarLab time-warped reverberator Eurorack module. For this design I tried to be close to the original dimensions of the UI’s elements, because I believe this module will more than often be accompanied by its older sibling, Magneto. This is also the reason why I restrained myself on using too much exposed copper areas, simply because Magneto is a plain black & white module.
StarLab has one RGB LED coming out of the panel that indicates the Input Gain. In fact this LED in an SMD type, which means that it’s a tiny component half the size of a lentil attached on the PCB and above it there is a lightpipe that transmits the light to the panel’s surface. This is secured to the panel with a metallic washer that’s really hard to remove without damaging the lightpipe. This is why I decided to ignore it and instead I made the PCB semi-transparent at that area. This means that the light from the SMD LED will still travel through the panel, but the brightness will not be the same as before. This is a tolerable compromise in order to avoid damaging the lightpipe of the original panel, and the panel itself.
The panel is made of PCB with matte black solder mask. The exposed copper is coated using the ENIG-RoHS (Nickel and Gold) finish for extra durability and nice golden color.
*Panel installation tips* StarLab is made of several independent PCBs that are secured on the front panel. In order to securely remove the original panel place the module of a flat surface facing up. This way the PCBs will rest on the table until you remove all the knobs and jack nuts from the panel. Try to be gentle with the amount of pressure you apply. After you remove everything pull the panel straight up and remove it. The PCBs will probably collapse left and right, don’t panic. Handle them carefully and everything will be alright. Don’t try to remove the lightpipe from the original panel, we won’t need it for the new one, store it safely as is. Now place the new panel above the PCBs and try to align them on the holes. After the panel is in place start screwing back the jack nuts and then push the knobs in place. Done!
**Disclaimer | Before you buy** This is not an official Strymon product. You are fully responsible for any damage you cause to your module, other gear or your self while handling, installing or using the parts that I offer. There are many through hole parts on the module that are soldered in a way that may lead to small center point offsets from one module to another. The panels are made with a margin at the holes to make it easier for you to install them, but again, be careful. I take no responsibility if you can’t install your panels for any reason, but I am willing to help guide you if you ask me. The panels are made of PCB so there will be minor imperfections on the silk screen, or the solder mask, the holes, the cuts etc.. In fact, it’s really rare for a PCB panel not to have imperfections. This has to do with the manufacturing process and the materials that are used.
Dusty Clouds STARLAB Alternative panel Matte Black / Gold


販売価格: 8,633円 [通常販売価格: 8,900円]


